How to store consents

Storing consent records is mandatory under GDPR for some countries. While most websites don't need this level of GDPR compliance, Consent Pro gives you the option to implement consent storage by sending consents to database.

Follow this step-by-step guide to store consents:

Note: Consent Pro is the standalone successor to the Cookie Consent solution previously included in Finsweet Components. You may still encounter mentions of “Cookie Consent” or “Components” in the screenshots of this documentation, but they remain accurate and applicable for following the tutorial.

1

Create a Cloudflare account or log in to an existing one

Go to cloudflare.com to access your account or create a new one.

2

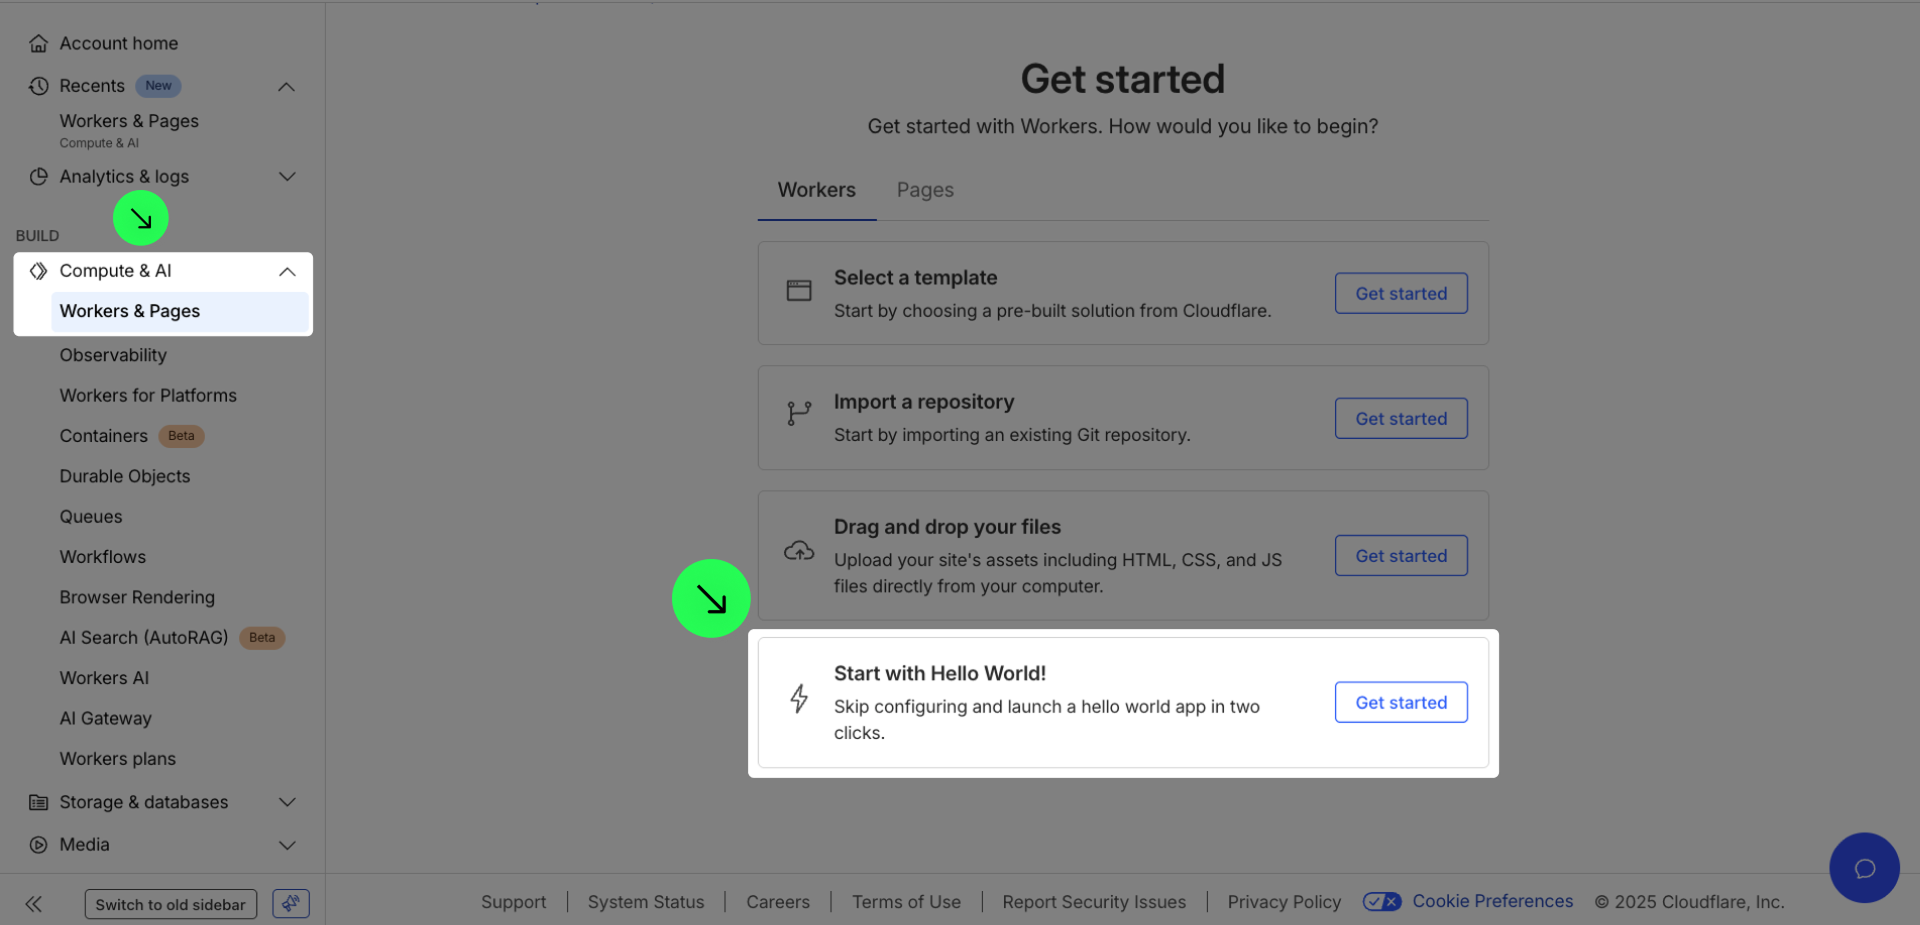
Create a new 'Worker'

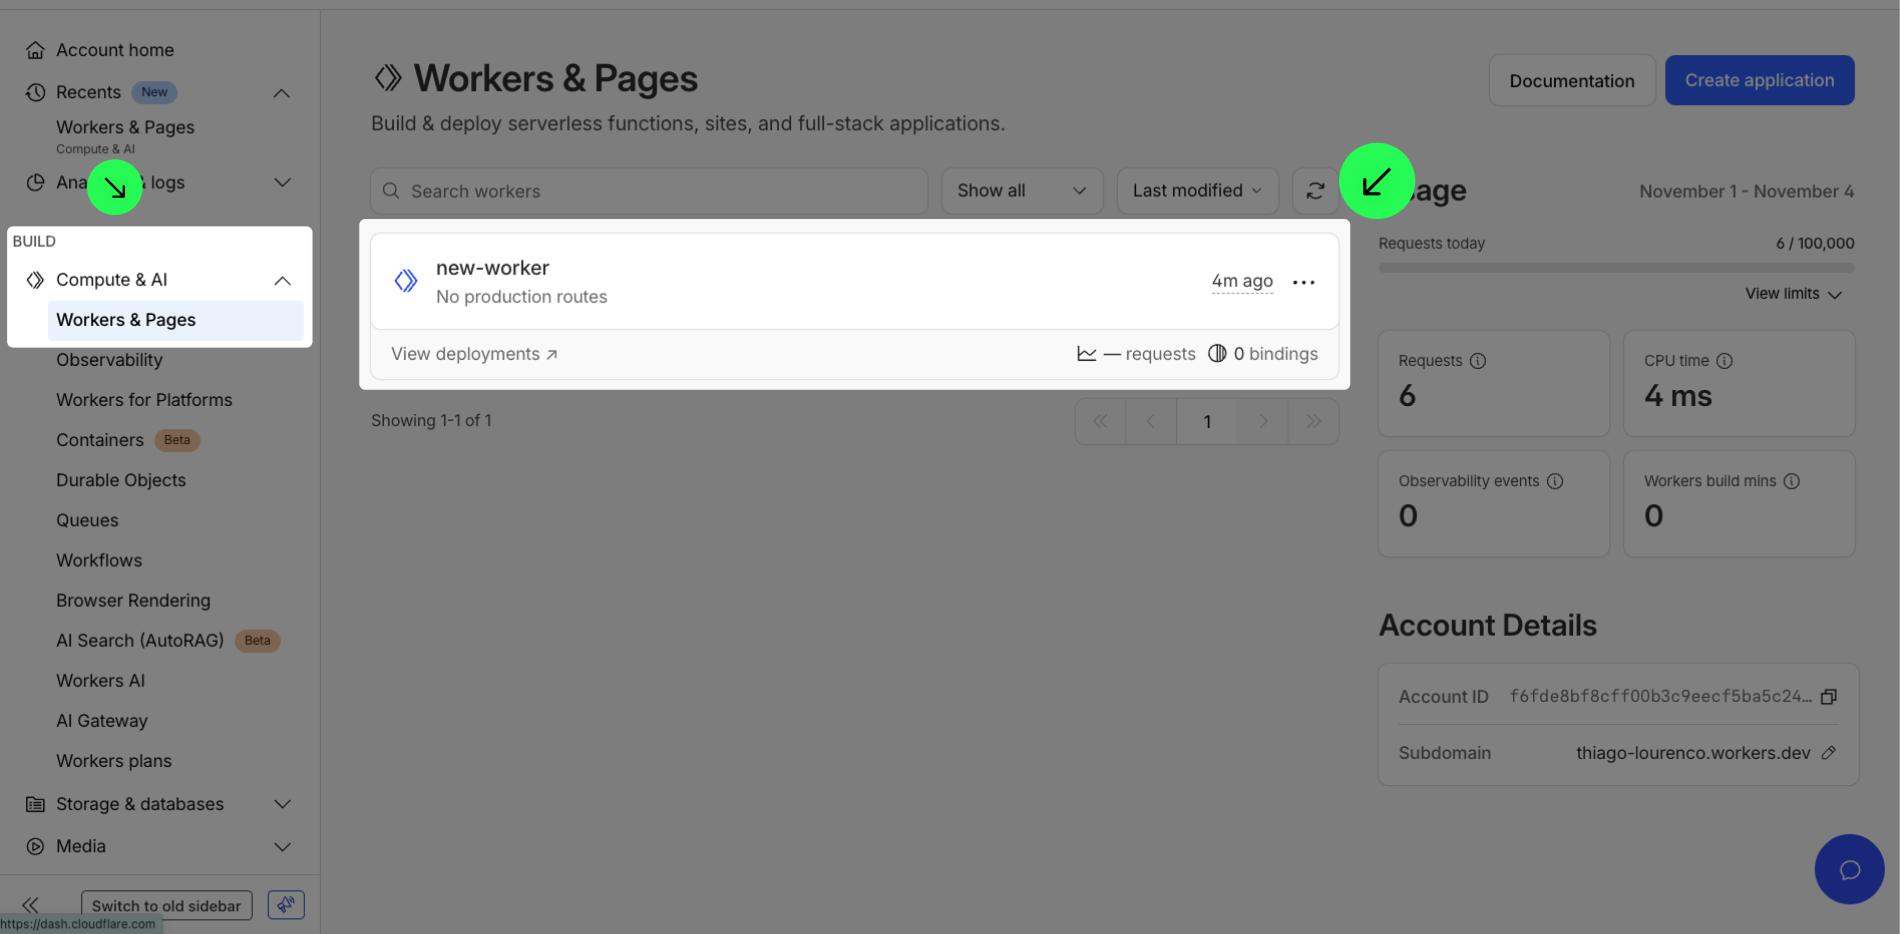
Go to 'Compute (Workers)' > 'Workers & Pages' > 'Hello World'.

Name your worker and confirm.

3

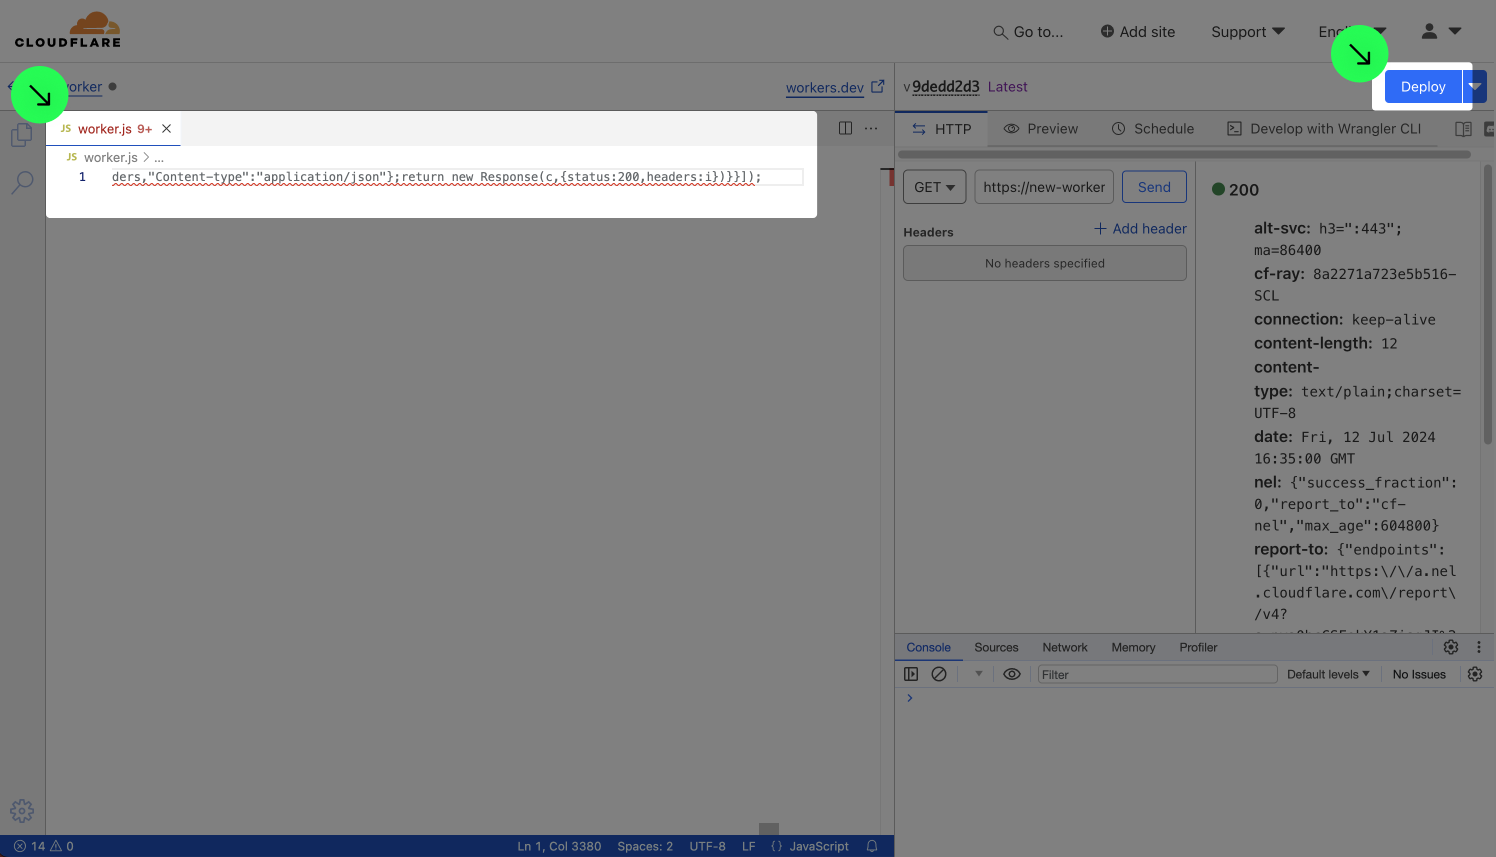
Edit the code

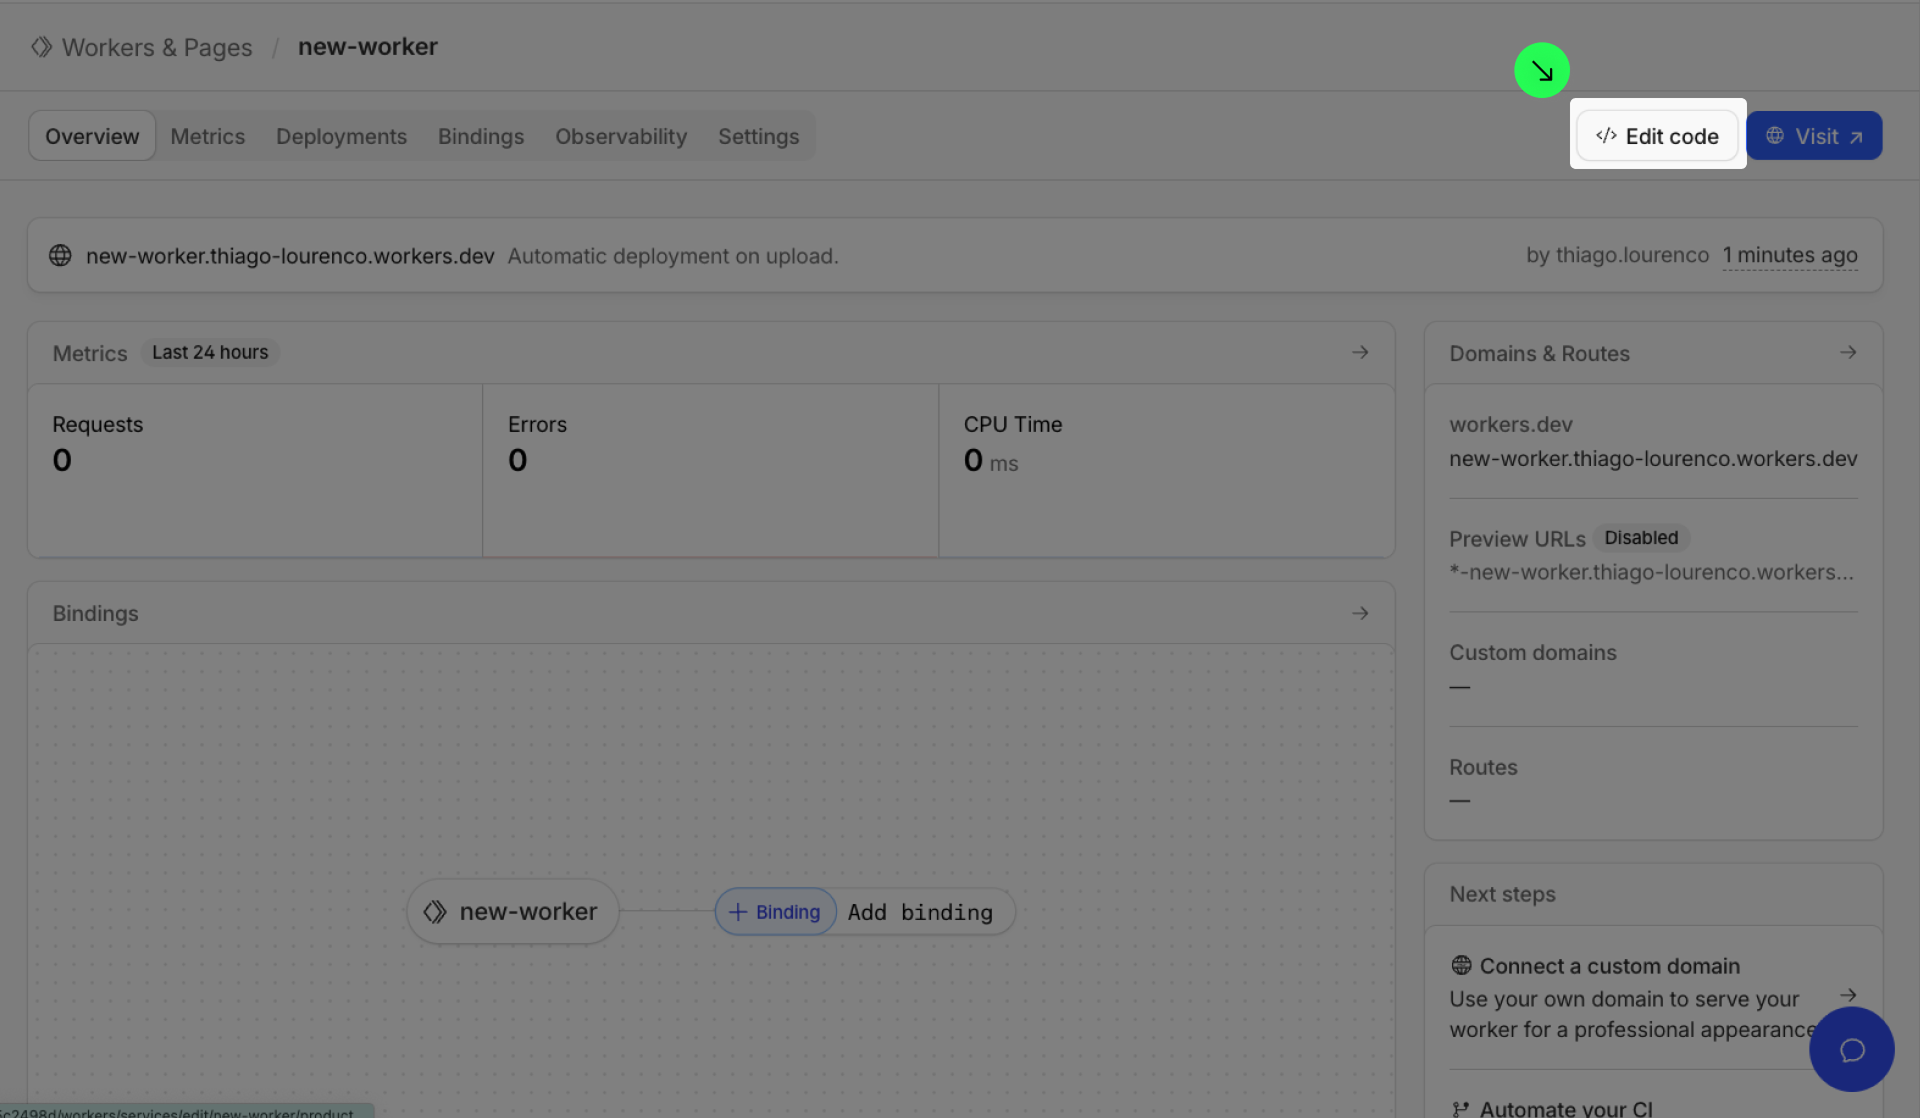
Click on 'Edit code'.

Remove the placeholder code.

Insert the code below:

https://cdn.jsdelivr.net/gh/finsweet/cookie-consent-worker@1/worker/script.js

Click on 'Deploy' and Confirm.

4

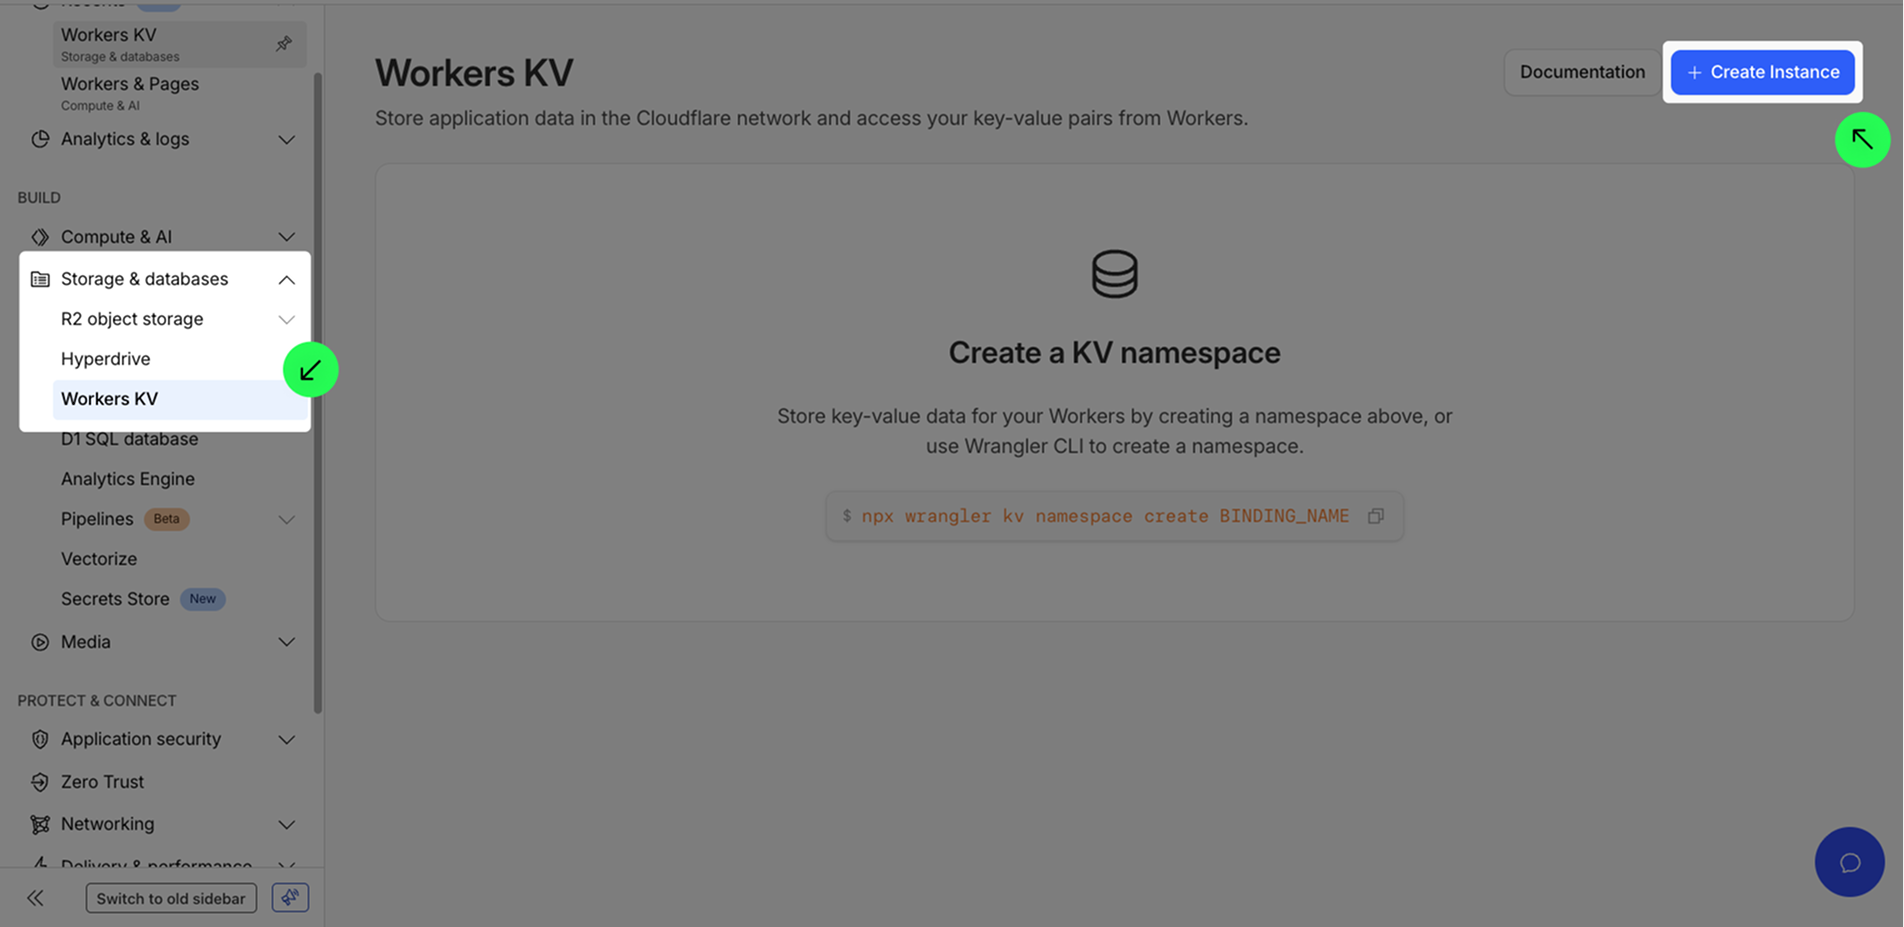
Create a 'KV'

Go to 'Storage & Databases' > 'KV' > 'Create a namespace'.

Name your namespace and click on 'Add'.

5

Bind the 'Worker' with the 'KV'
Go to 'Workers & Pages''Overview' and select the worker you created.

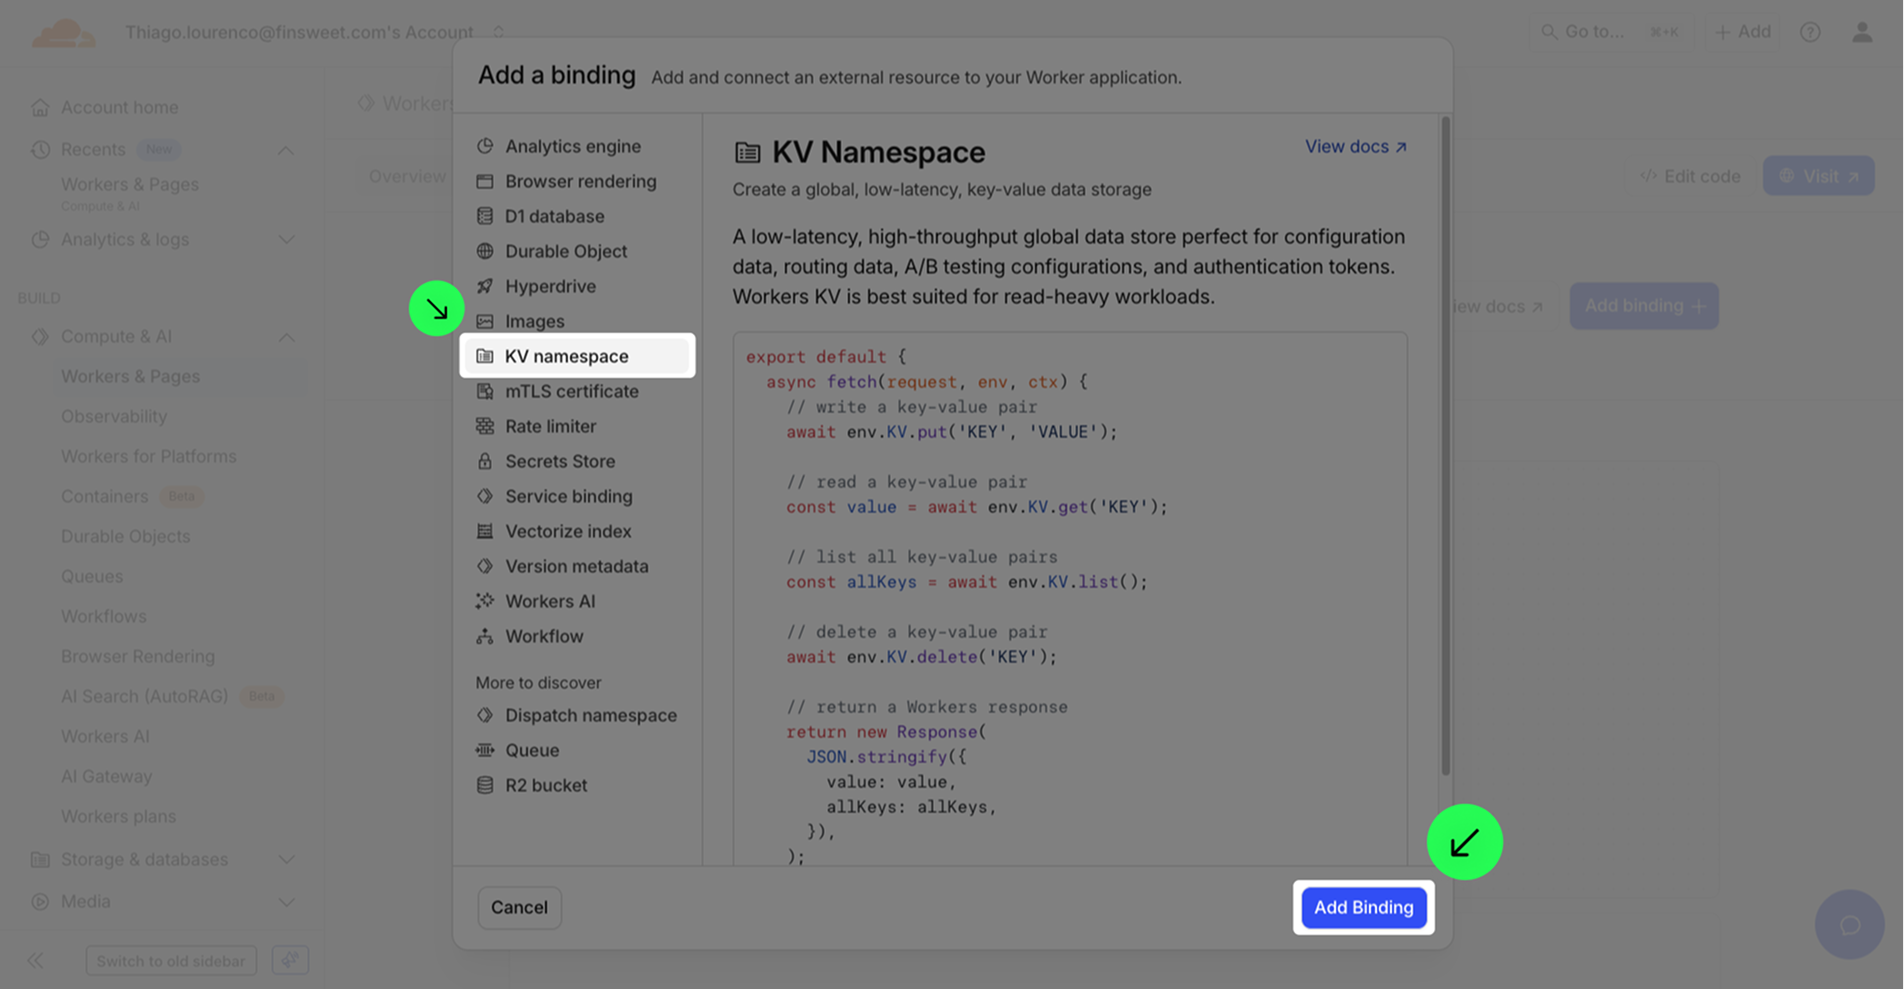
Go to 'Settings' > 'Variables' and click on 'Add binding'.

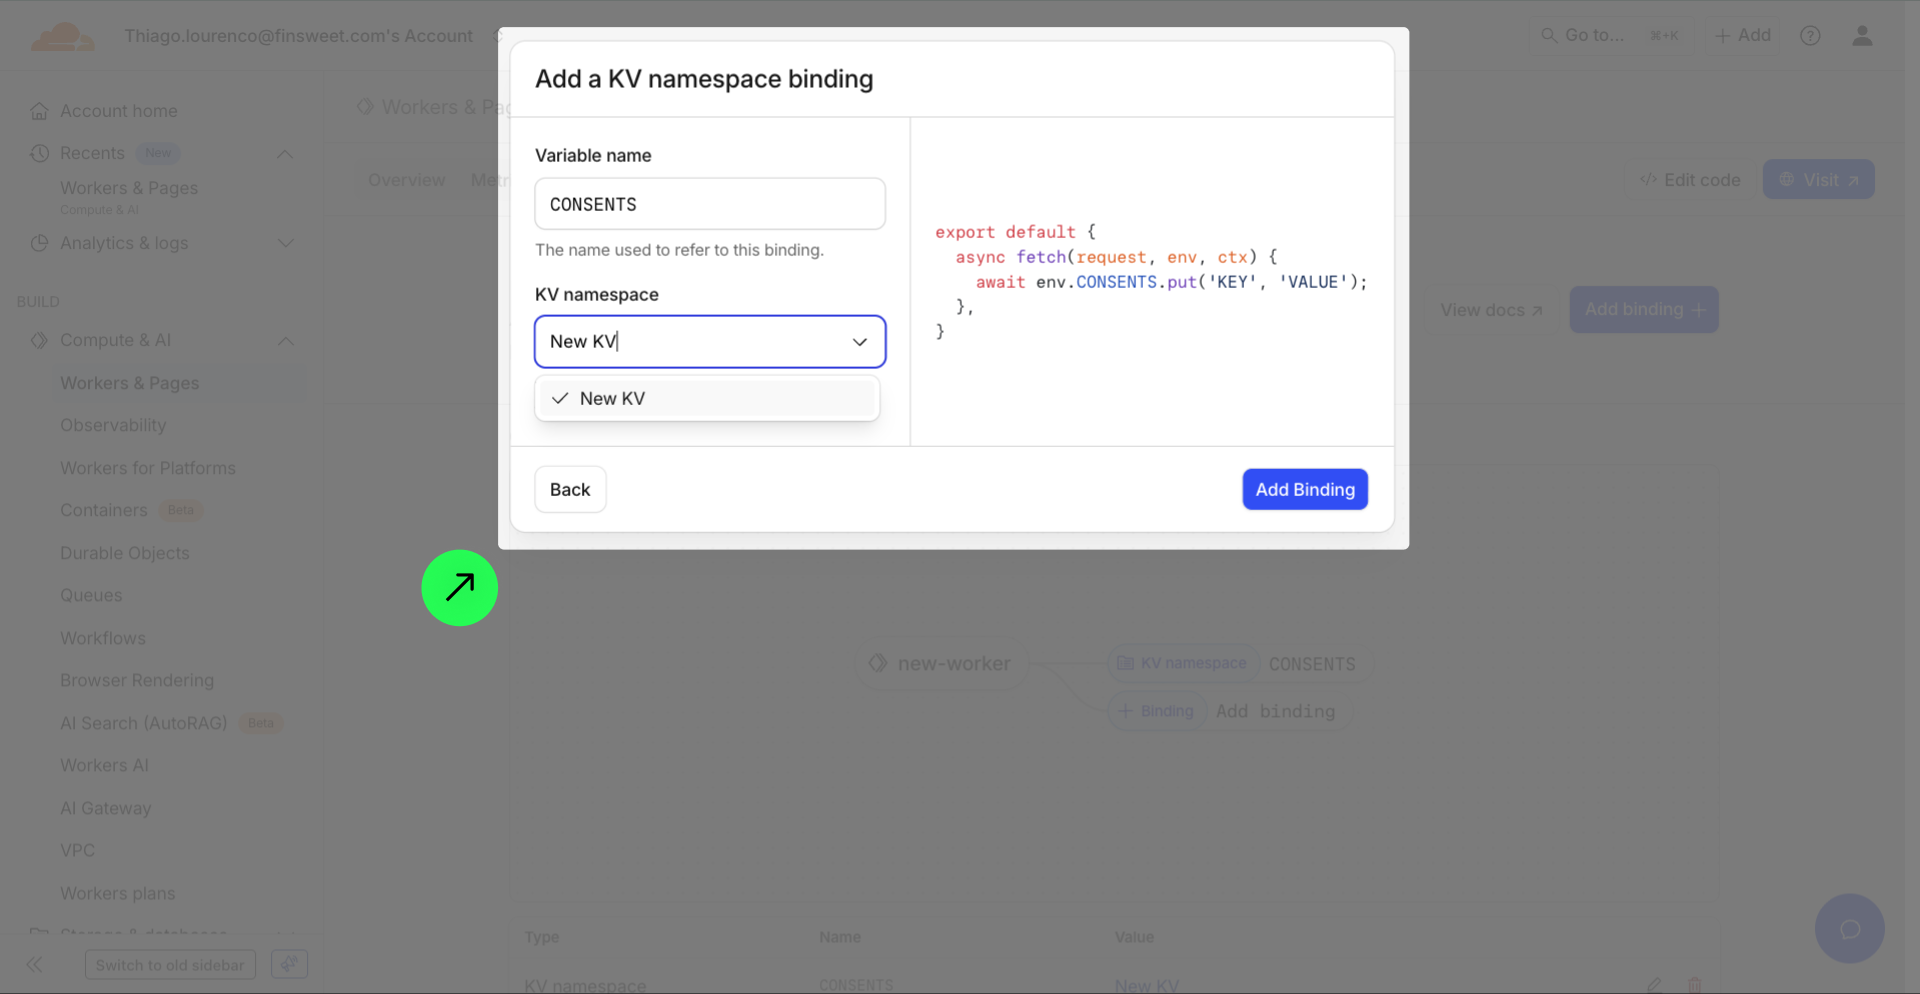
Add variable name 'CONSENTS', connect your KV spacename and click on 'Deploy'.

The variable 'CONSENTS' is case-sensitive. Make sure to use the variable name exactly as 'CONSENTS' in uppercase. Other variations, such as 'Consents' or 'consents', will not work.

6

Add the endpoint

Right click on 'Visit' link and click on 'Copy Link Address' to get the endpoint URL.

Paste the endpoint URL in the Cookie Consent Component in the configure tab and click on 'Update Component'.

7

Publish your project! Done!