COOKIE CONSENT DOCS
Embed iFrames
How to Embed Consent-Compliant Iframes in Webflow
In case you are using embedded iFrames on your page, please follow the documentation below to make them cookie-compliant and ensure the iFrame is displayed only after users have given consent.
Follow this step-by-step guide to embed iFrames:
Note: Consent Pro is the standalone successor to the Cookie Consent solution previously included in Finsweet Components. You may still encounter mentions of “Cookie Consent” or “Components” in the screenshots of this documentation, but they remain accurate and applicable for following the tutorial.
1
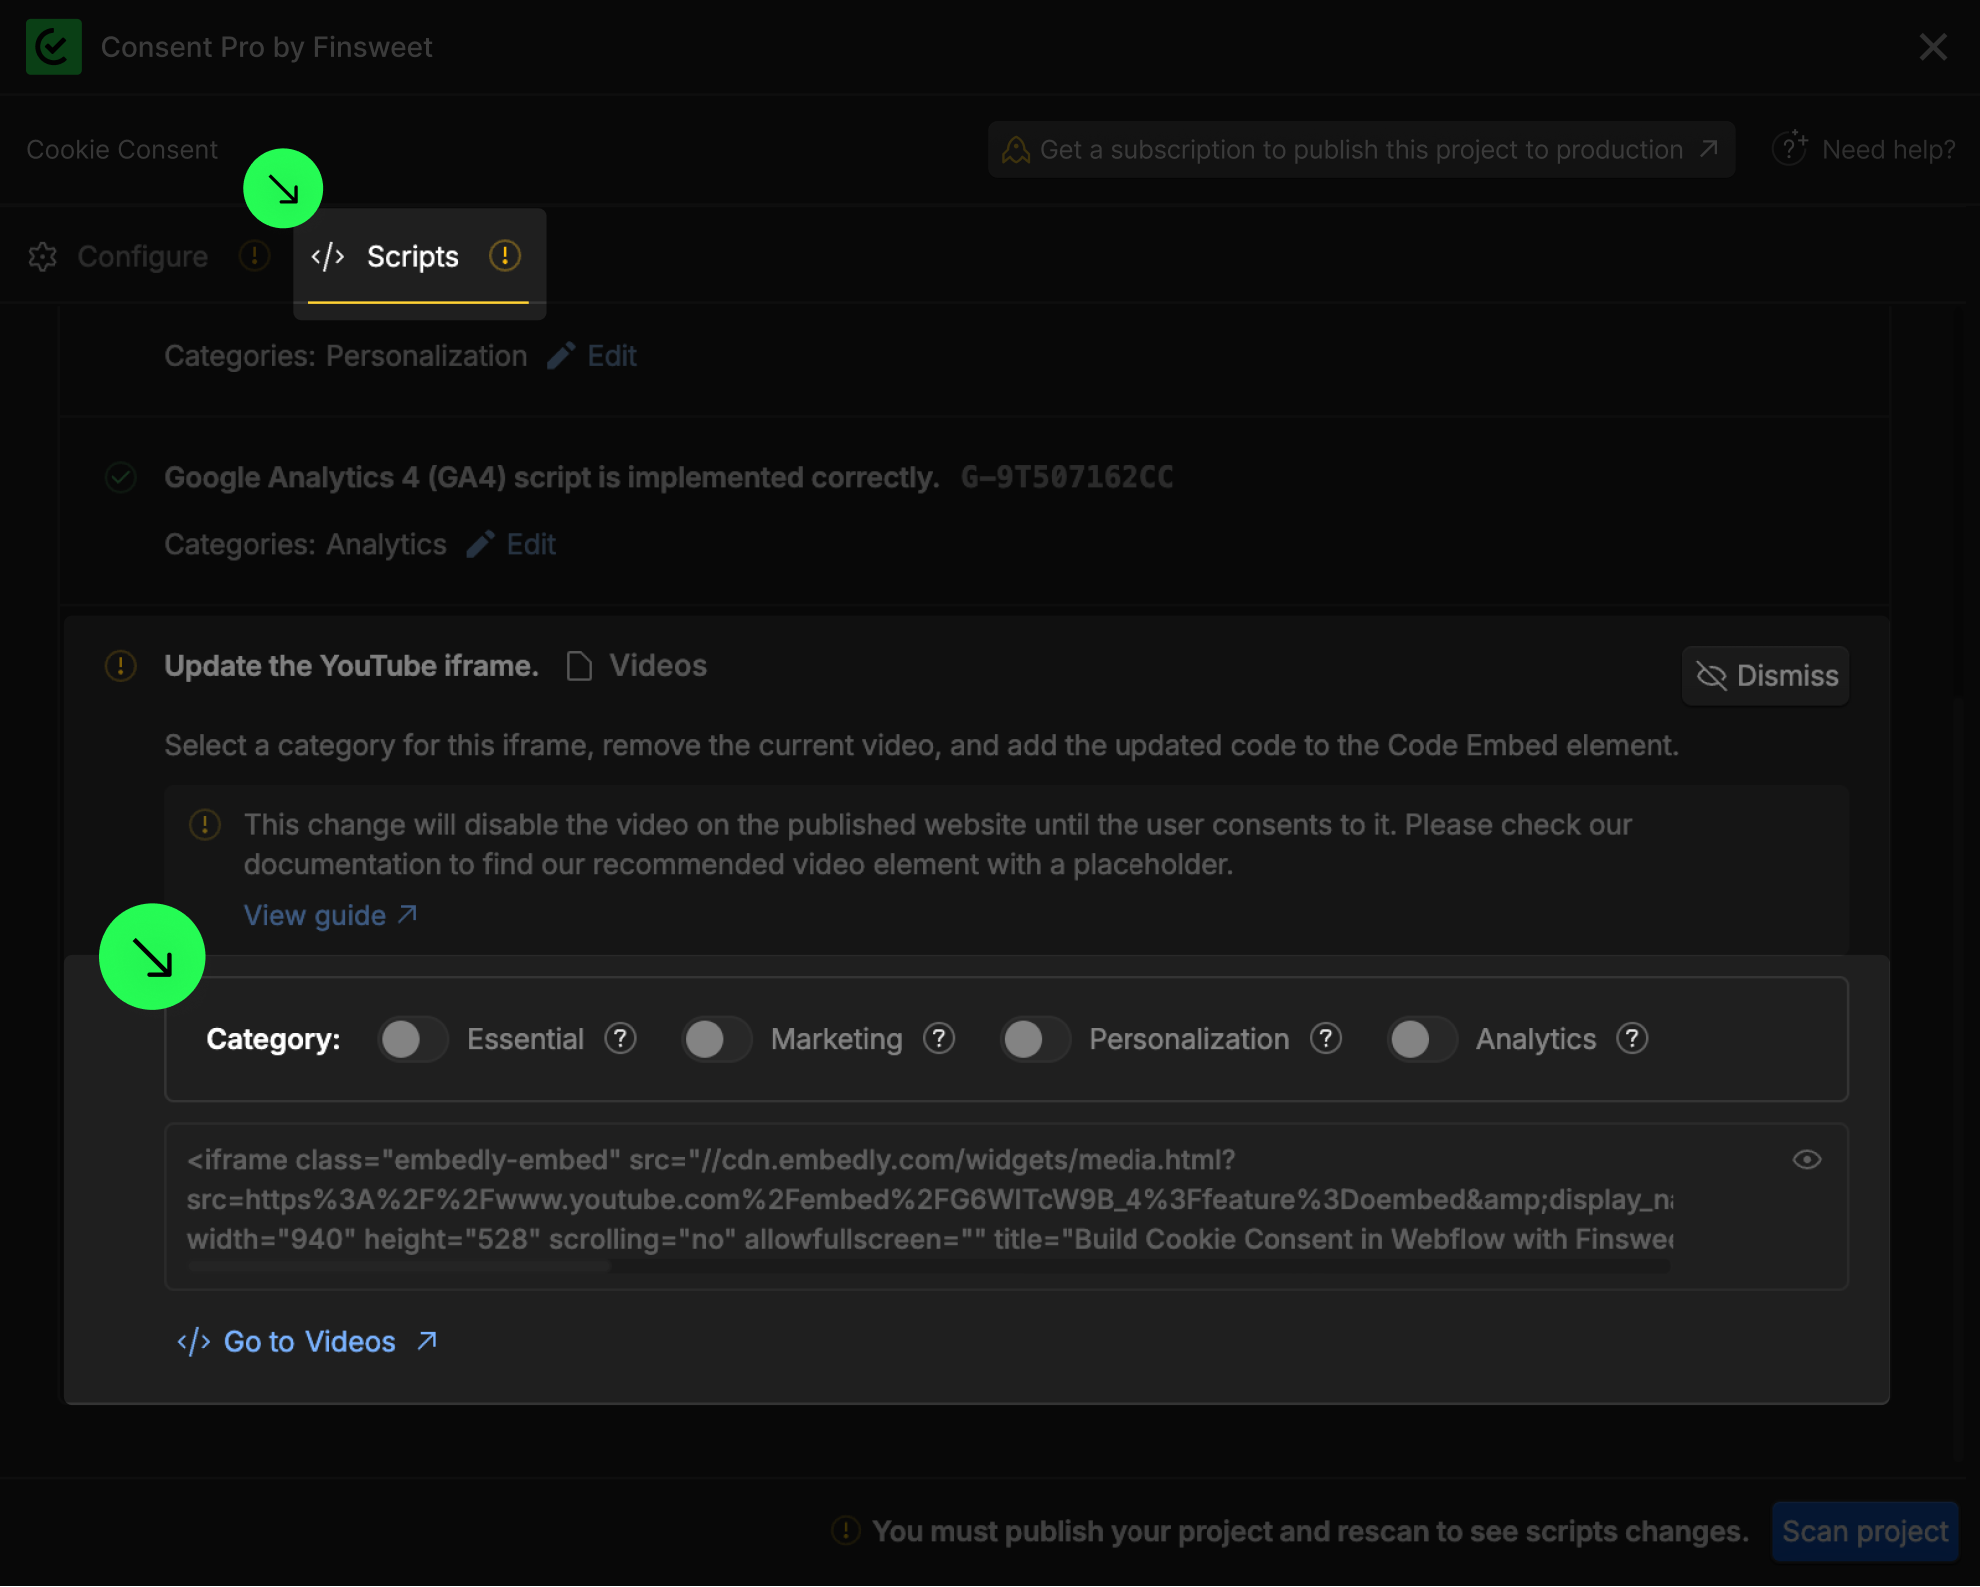
Select a category for the iFrame detected in the script tab.

2
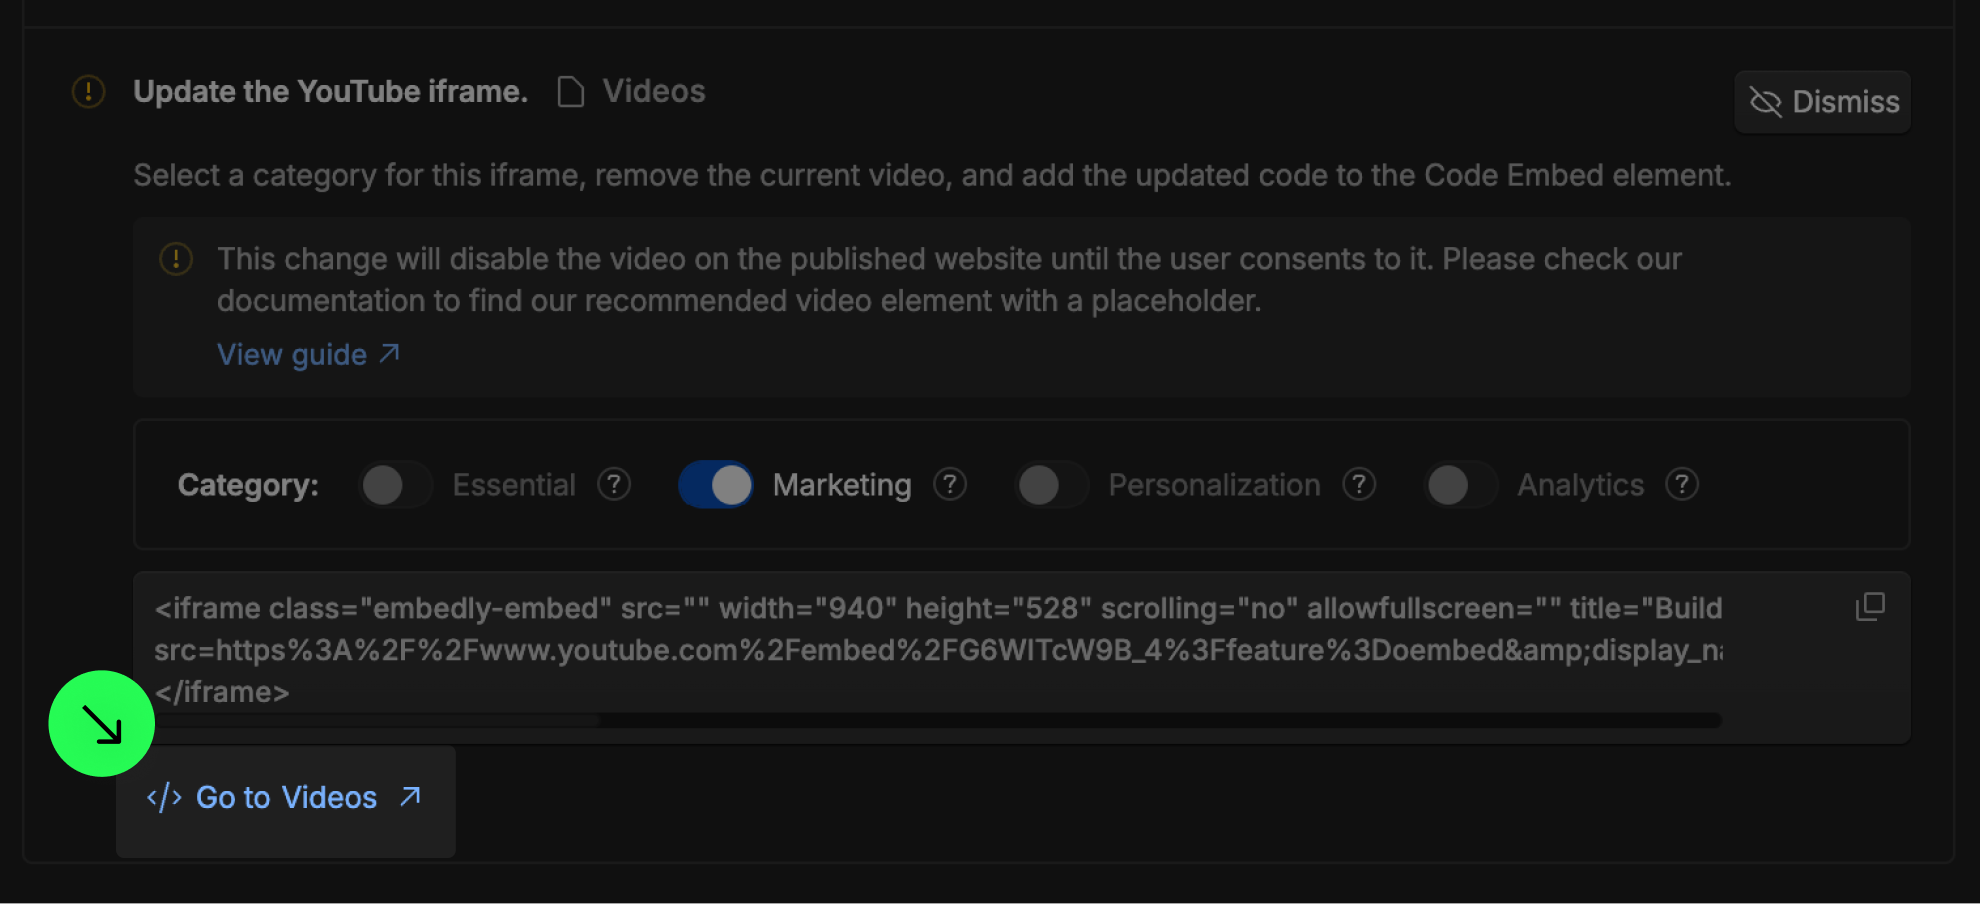
Go to the page where this iFrame is placed.

3
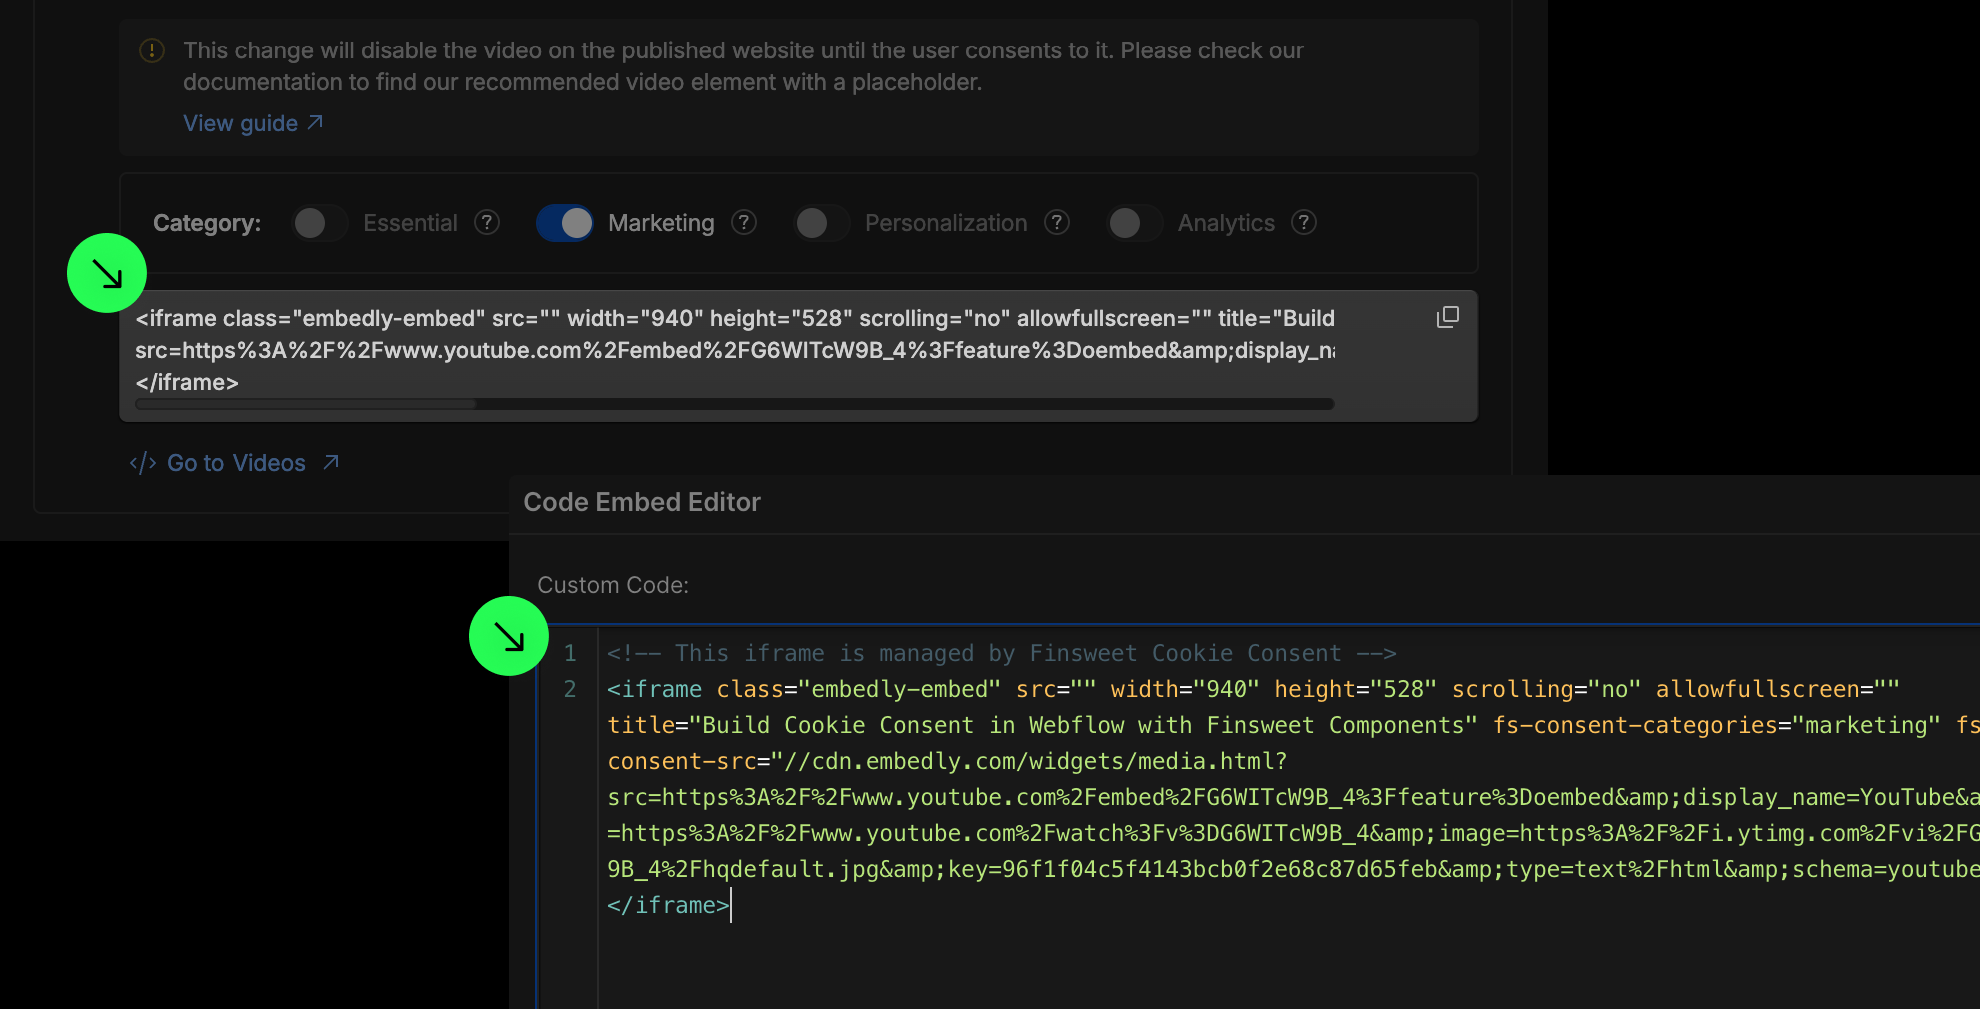
Add an Code Embed element to the page.
4
Copy and paste the updated code inside the Code Embed.

5
Publish your project! Done!
Still need help?
Get Support


